How to Prepare Surfaces for Hammerite Metal Paint
How to Properly Prepare Surfaces for Hammerite Metal Paint
Introduction
Hammerite Metal Paints are a popular choice for protecting and enhancing metal surfaces. These paints offer durability and rust protection, making them perfect for various applications. Proper surface preparation is key to achieving the best results with Hammerite Metal Paints. In this guide, we'll walk you through each step to ensure your project gets off to a great start.
Understanding Hammerite Metal Paints
What Are Hammerite Metal Paints?
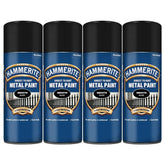
Hammerite Metal Paints are specially formulated to protect metal surfaces from corrosion and wear. They can be used on both interior and exterior projects, providing a tough finish that stands up to the elements. The paint range includes products for different needs, such as Hammerite Metal Spray Paints, which offer easy application and an even coat.
Types of Hammerite Paints
Hammerite Metal Spray Paints are designed for quick and efficient coverage. Unlike traditional paint, which may require brushes or rollers, spray paints allow for a smooth application with less effort. Hammerite products also include options for different finishes, from matte to gloss, catering to your style needs and preferences.
Surface Preparation Steps
Cleaning the Surface
Before applying any paint, it's crucial to start with a clean surface. Dust, grease, or old paint can prevent Hammerite Metal Paints from adhering properly. Use a quality degreaser or soap solution to clean the metal. A wire brush or sandpaper can help remove dirt and debris effectively.
Removing Old Coats
If your metal surface has an old coat of paint or rust, you must remove it. Wire brushes, scrapers, or chemical strippers are effective methods. Be sure to follow the manufacturer's instructions and wear safety gear. This process can take time, but effective removal is essential for good adhesion.
Repairing Imperfections
Inspect your metal surface for any dents or scratches. Use metal fillers or putties to repair imperfections. Make sure to follow the product instructions for application and drying to ensure a smooth surface before painting.
Choosing the Right Paint for Metal
Factors to Consider
When selecting paint for metal surfaces, consider the environmental conditions. Will it be exposed to moisture, or will it face harsh sunlight? These factors will influence your choice of Hammerite Metal Paints. Think about the desired finish, too—do you want a high-gloss finish or a more muted appearance?
Hammerite vs. Other Brands
Hammerite stands out among competitors due to its unique formulation that prevents rust and corrosion effectively. Other brands may not offer the same level of durability or ease of use. Hammerite's ability to be applied directly onto rust without needing a primer is another significant advantage.
Application Techniques
Tools and Equipment
To apply Hammerite Metal Paints successfully, gather your tools. A paintbrush or roller may be suitable for larger areas. For spray paints, ensure you have a proper spray gun or aerosol can. Don't forget your safety equipment, such as gloves and a mask, to protect yourself during the process.
Step-by-Step Application Guide
Begin by shaking your Hammerite paint can thoroughly. When using a brush or roller, apply the paint evenly, working in manageable sections. For spray paint, maintain the recommended distance from the surface, usually around 12 inches. Light, multiple coats are better than one thick coat, allowing for a smoother finish.
Drying Time for Metal Paints
Factors Affecting Drying Time
Drying times for metal paints can vary based on several factors. Humidity and temperature play a significant role in how quickly the paint dries. A higher humidity level may extend drying time, while a warm day can speed things up. The thickness of the paint layer also impacts drying; thicker layers take longer to cure.
Expected Drying Times for Hammerite
Hammerite Metal Paints typically dry to the touch within one to two hours, but complete curing may take up to 24 hours. Always refer to the manufacturer's instructions for specific drying times related to the product you are using. A good tip is to gently touch the surface—if it feels tacky, it’s not ready.
Conclusion
Properly preparing your metal surface is essential for achieving the best results with Hammerite Metal Paints. By following the steps outlined in this guide—cleaning, removing old paints, and repairing imperfections—you ensure a solid foundation for your paint. Don't hesitate to invest time in preparation, as it will significantly enhance the durability and finish of your project. Enjoy the process, and look forward to your beautifully painted metal surfaces!


